Summary: A Brief Instruction to convert DVD for Any Kindle Fire with Pavtube DVDAid to complete the DVD to Kindle Fires’ Conversion.
Kindle Fire FAQ:
“I have a number of golf instruction DVDs and I need a tool which can help me convert some files for my Kindle Fire HD. Sometimes, my wife will also doing some for her Kindle Fire HDX. So, my question is how do I put DVD files on my Kindle Fire?”

So, Can Kindle Fire play Golf Instructional DVDs? The answer is no. Although it is impossible to provide DVDs to Kindle Fire playing, we can convert DVD movies to Kindle Fire compatible formats(MP4). Pavtube DVDAid comes to be the best DVD to Kindle Fire converter and enable you watch golf instruction DVD movies Kindle Fire, Kindle Fire HD 6/7, Kindle Fire HDX, Kindle Fire HD Kids Edition.
With it, you can also rip DVD on Any Smartphones or tablets as you like, just like: iPhone 6/6 Plus, iPad Air 2, iPad 3, Surface Pro 3,Nook HD/HD+, Sony Xperia Z2, Galaxy S5, S4, S3 and so on. The equivalent Mac version is DVDAid for Mac. Just get it now and here I share you a step-by-step guide: How to convert DVD for Kindle Fire Series tablets for smoothly playing!
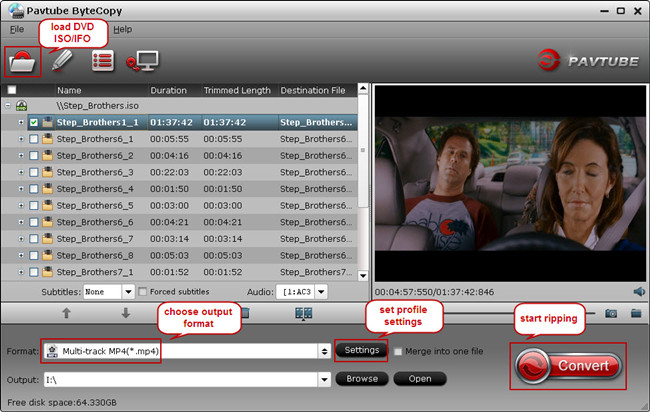
Step 1: Add DVD movies
Start the DVD to Kindle Fire Converter and click DVD disc icon to load source DVD movies. If you have backup the entire DVD disc on hard drive, you can also click DVD Folder button to load the movie folder.

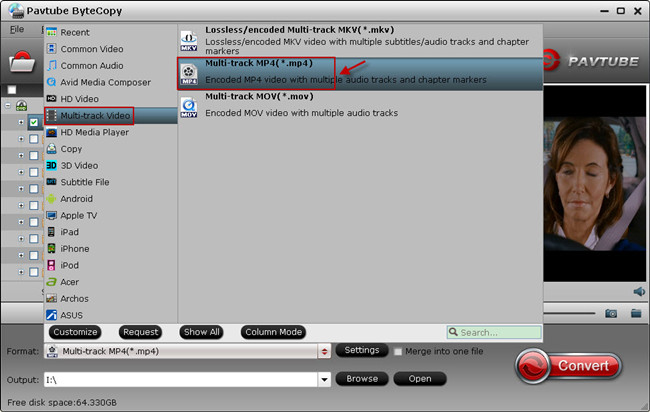
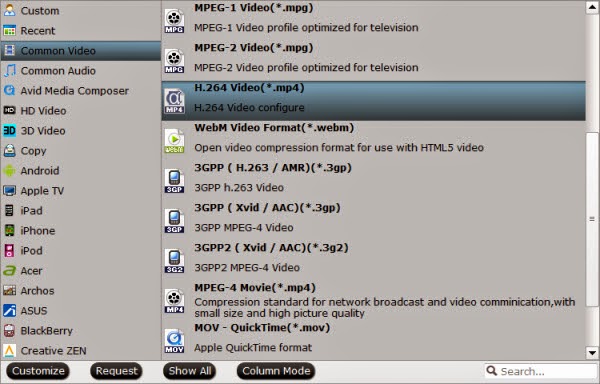
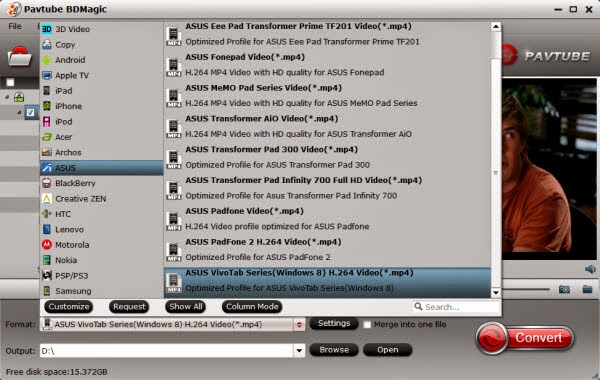
Step 2: Choose output format
Now choose the output format for playback on your Kindle Fire. You can get optimized videos for Kindle Fire Series under Format > Android > Amazon Kindle Fire H.264(*.mp4) or Amazon Kindle Fire HD H.264(*.mp4).

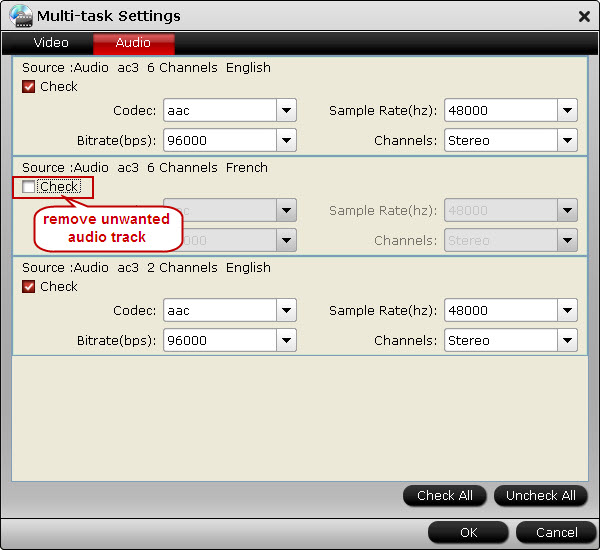
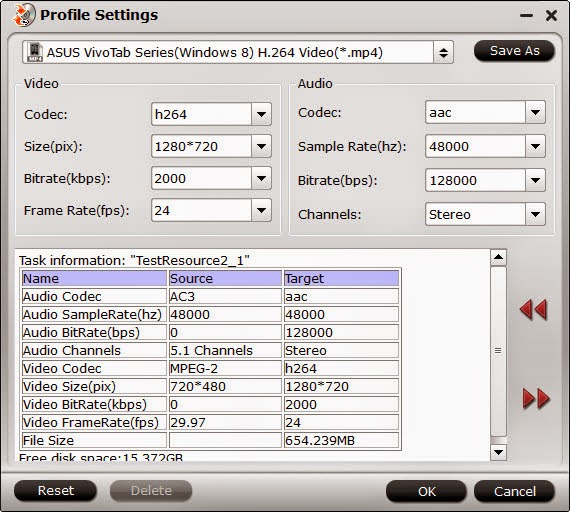
If you like, you can click "Settings" to change the video encoder, resolution, frame rate, etc. as you wish.
Step 3: Start the DVD to Kindle Fire conversion
When everything is OK, just press the "Convert" button to start the conversion from DVD to Kindle Fire. It will not take much time. Just wait for the conversion process to get done. Read: transfer guide.
Now, you can easily get your Golf Instructional DVDs on Kindle Fire, Kindle Fire HD 6/7, Kindle Fire HDX, Kindle Fire HD Kids Edition etc. It works great!!!
Here’re some Kindle Fire tips:
Kindle Fire FAQ:
“I have a number of golf instruction DVDs and I need a tool which can help me convert some files for my Kindle Fire HD. Sometimes, my wife will also doing some for her Kindle Fire HDX. So, my question is how do I put DVD files on my Kindle Fire?”
With it, you can also rip DVD on Any Smartphones or tablets as you like, just like: iPhone 6/6 Plus, iPad Air 2, iPad 3, Surface Pro 3,Nook HD/HD+, Sony Xperia Z2, Galaxy S5, S4, S3 and so on. The equivalent Mac version is DVDAid for Mac. Just get it now and here I share you a step-by-step guide: How to convert DVD for Kindle Fire Series tablets for smoothly playing!
Step 1: Add DVD movies
Start the DVD to Kindle Fire Converter and click DVD disc icon to load source DVD movies. If you have backup the entire DVD disc on hard drive, you can also click DVD Folder button to load the movie folder.
Step 2: Choose output format
Now choose the output format for playback on your Kindle Fire. You can get optimized videos for Kindle Fire Series under Format > Android > Amazon Kindle Fire H.264(*.mp4) or Amazon Kindle Fire HD H.264(*.mp4).
If you like, you can click "Settings" to change the video encoder, resolution, frame rate, etc. as you wish.
Step 3: Start the DVD to Kindle Fire conversion
When everything is OK, just press the "Convert" button to start the conversion from DVD to Kindle Fire. It will not take much time. Just wait for the conversion process to get done. Read: transfer guide.
Now, you can easily get your Golf Instructional DVDs on Kindle Fire, Kindle Fire HD 6/7, Kindle Fire HDX, Kindle Fire HD Kids Edition etc. It works great!!!
Here’re some Kindle Fire tips: